Showing posts with label Board Game. Show all posts

Tuesday, 14 June 2016

102. From base to space. Silver Tower part 1.

Hey Underhivers!

I know I haven't been very consistent recently, but I have been working on other projects (as always).
If you'd like to chock those out head to The science of selling yourself short for more info!


Back to it.
I hit a hobby wall in the shape of too many boardgames with miniatures that are un built and unpainted.
So I've made it my mission to get these out of the way.

The problem with this is that building miniatures as they come in the box bores the life out of me...
So far I have built all of the Miniatures from Assasinorium Execution Force, and it nearly killed me.

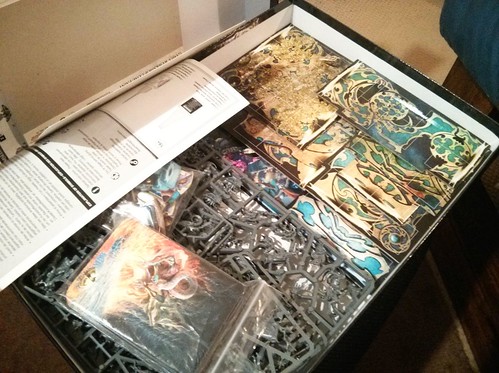
So going into my next task; The Silver Tower, I've decided to try and make things a little more interesting for myself, without converting any of the models.


001

The game is fairly varied in all fairness.
unlike Execution force, there isn't 15 of essentially the same figure... the most of one type is 8.

But I still want to make them 'my own.'

This starts from the ground... no up, just the ground.

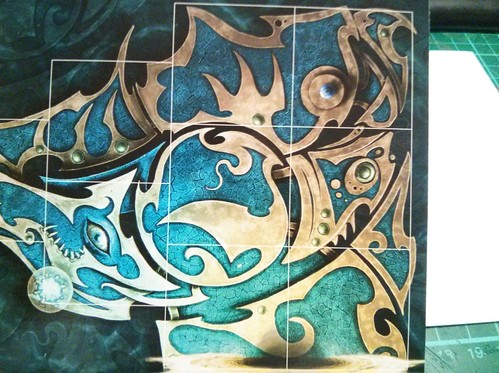
Most of the tile sin Silver Tower are this cracked turquoise stuff, with gold banding.

002

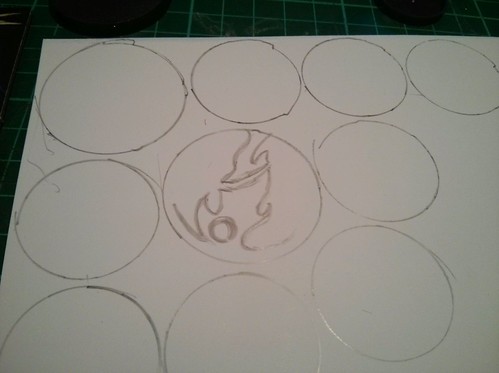
The plan is pretty simple; copy it onto the basses.
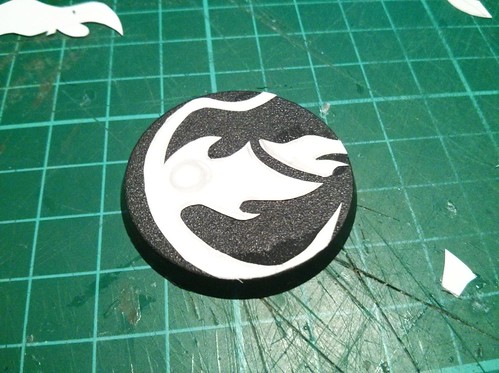
To do this I've used the Games Workshop palette pads to created the crazy shapes that are all over the board tiles.

003

004

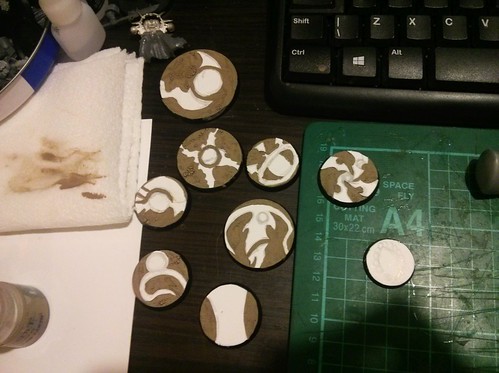
Obviously, these will be painted gold, and any 'raised' areas will be added in using shading and highlighting.

As for the cracked floor, I decided to cheat...kinda.

005

Agrellan earth; a self crackling paint from the citadel paint range.
All I ave to do now is paint it!
I'll be using Stegadon Scale Green, Sotek Green and Temple Guard Blue to do the job.
Before that though I have a ton more basses to do...

That's all for now!

Keep you eyes peeled for more soon.

-DH-

Tuesday, 26 May 2015

Mice and Mystics @ The science of selling yourself short.

So in my previous post I mentioned I was working on the miniatures from Mice and Mystics.

001

I'm enjoying painting these up, well, some of them anyway.

If you want to follow this project then you can!
Head over to my first post about it on The science of selling yourself short.

Tuesday, 7 January 2014

38. Urban Rust. Building a Gaming Board part 10.

  Between Christmas, laziness and my phone herping and derping Updates have been sparse.

I finally managed to fix my phone today, so I can finally upload pictures again.

Less offensive introduction than usual? Must try harder...

So yes, updates.
Gaming board again.

I decided that I wanted a bit of ware and tear on my board.
This will mainly be on the paving slabs...but it will be done after I've painted them to their 'peak' condition.

So in the meantime I thought I'd start my lampposts.

How does one wear and tear a lamppost?
Aside from physical damage (light not working, smahsed glass, missing panels...) from what I've seen lmapposts tend to be painted.
So the obvious basic damage is worn and chipped paint... which leads to rust


med_gallery_33843_5272_971991.jpg

I tried to emulate this for my own (albeit a bit more severe/ different colours)

med_gallery_33843_5272_1908248.jpg

med_gallery_33843_5272_1173058.jpg

They've all been rusted up, but this one is my test subject for futher detailing.
Right now it just needs the light/ glass section finishing off, and a bit more brown/ rust stains.


Any opinions on rust welcome, weather they are about mine here, or about painting weathering in general.
Personally I'm not fond of it in most cases.
Done right/ thematically and it can add great character to a project.
Done wrong and it just makes something look way too busy.

Anyways,
PEACE

-DH-

Thursday, 19 December 2013

36. Follow the Grey Slab Road. Building a Gaming Board part 9.

So... much....grey...

Dies.
Yup, I've been painting my board some.
It doesn't really look like I've done much (When in reality I've spent about 5-8 hours on it... I've lost count. I hate life).

So I thought Id share some bits and bobs with you.


First off is my tests cheme for the paveing slabs (The set on the right).

med_gallery_33843_5272_54146.jpg

Pretty simple.

- Undercoat black (Chaos black/ Any acyrlic paint),

- Paint dark grey (Any will do. I used Black acrylic and white crylic. But the GW base dark grey would be fine),

- Paint light grey (may require 2 coats; My mix was somewhere between codex and fortress grey/ Mianly white with a hint of black = Pavement grey),

- Wash with watered down black, making sure it goes into the crevices. The while still wet use some tissue paper to 'dab' off most of the paint.
This will leave the paint in the crevices and give the slab a darker tone, with a dappled effect on it.

- Drybrsuh light grey (Might have to do it twice; pavement grey),

- Very light Drybrush light-er grey (pavement grey with more white).


Done!


  Yeah, it is not a masterpeice of paintwork, but I think it looks a'ight. Especially when they'll be a shed load of them.
Adds a bit of texture prior to any detailing that might get done.


I've already done the base grey on all the pavements;


Looks a bit shitty at the moment. But it does end up like the first picture, so I'm okay with it.
Glad they're out of the way.

Things left to do;
- Finish slabs (Wash black, Dab, Drybrush x 3),
- Finish road (Very light blue-grey drybrush),
- Paint details (Drains, man-holes),
- Paint lampposts,
- Clean up edges (Black boarder).

And that should do it.

SO GODDAMN CLOSE!!
-DH-


Monday, 9 December 2013

34. I Could Have Used a 50 Shades of Grey Pun, but I Didn't Want to. Building a Gaming Board part 8.

Waheeeyyy. I'm back

    I had some minor problem with my internet.
That is what happens when you let a hive ganger set it up for you.


Or in this case, Virgin. My modem died in short.
Got a new 'hub.'

So on with the show!

Here is the whole board, under coated.

med_gallery_33843_5272_857084.jpg

And here it is after 2 coats of grey

med_gallery_33843_5272_1069619.jpg

A bit patchy, but subsequent layers and potentially washes should sort it out.
Nothing else to say...

BUT SOON!

-DH-

Wednesday, 20 November 2013

32. A Sticky White Mess. Building a Gaming Board part 7.

HUR HUR.

Excuse the terrible joke. Filler does make quite the mess mind you.

So, as promised, updates on the board.

med_gallery_33843_5272_129739.jpg

med_gallery_33843_5272_9219.jpg

As you can see they are pretty much done.
As with my other board tiles I'll probably add another layer of sand on top of the filler+sand combination just for good measure.
Then it is just a matter of neatening up some bits here and there and boom!

...to painting...
(The running joke of my hobby life).

-DH-

Monday, 11 November 2013

31. A Strong Learning Curve. Building a Gaming Board part 6.

Following in my rich vein of form (and terrible puns)...

This update is about the board.
So. If you want to follow along;

You will need:
  • PO210 00/H0 Self Adhesive Paving - found here: http://www.metcalfem...adhesive-paving
  • PVA glue - While the tiles are self adhesive, the adhesive quality is poor. Glue them down.
  • Tea Stirrers (See previous post about making the curb)
  • Curved curb pieces (See previous post about curved curb pieces; I made a press mould of mine)
  • A LOT OF TIME!
Lets do this!

So the first thing I wanted to do was figure out how exactly to build the bit where the two straight pavements meet.

This involved a lot of terrible prototypes, this was the best (before the one I was eventually to use).


The main problem here is that the pavement slabs don't match the same pattern as the pavement pattern I have previously used.
So I came up with a better idea;


These are the two slab patterns used to make my pavement. I've glued them to a piece of paper, and cut them out.
this way I can check the width of my pavement at any time.


Using this, I came up with this, which incidentally is...

Step 1;


Attach the above to the board. DO NOT GLUE ANYTHING DOWN (This is just in case you find something doesn't fit/ does fit better when you personally attempt this).

That weird curved bit? That is the 'frame' the tiles come with. The width is the same as a narrow slab.
This makes your template/boundary for the curved part of the pavement.


Step 2;

Using these boundaries, build the pavement as normal until you reach the apex of the corner.


Step 3;

This is where it starts to get complicated. You can no longer lay down equal length of tile.
Jostling the slabs until they fit can be quit tricky, and they will never fit exactly right, so you kinda just have to man up and deal with it not being perfect (this made me a very sad panda).


If you follow my pictures bellow you should be reasonably okay.


Step 4;


Step 5;


Step 6;


Glue it all down, except for the 'weird curved bit.'

As previously stated, when I did this I found some tiles didn't fit exactly right, and I managed to tweak my original design a little to make it fit better.
You should be able to replace the 'weird curved bit' with the relevant slabs, as per the slab pattern that has been used throughout.
The only exception to this is the apex of the curve.


This should be made from the apex of the 'weird curved bit.' It may have to cut into a tile a little to fit snugly.

See bellow.


Step 7;

Glue inside curb down and carry on with pavement.


Inisde curve done!

The outside curve should be roughly the same.

However, if the above seemed way too fiddly for your liking, I prepared a different way of doing it (which, due to my outside curve being slightly larger than my inside curve, I had to use).

So...
Step 8;

Prepare outside curve.
To do this I super glued the pieces down on to a piece of paper first, and then just cut it out.


Step 9;


Glue this curved piece down.

You need to match the right angle corner with where the two curbs meet on the inside.
When you do this there will be a large amount of space between the piece you've just glued down, and the curved curb. Don't worry about it.
We fix that in...


Step 10;


Remember that 'weird curved bit? It kinda makes a comeback.


(Apologies for the upside down picture).
Basically take that corner and cut it to size.


I know it doesn't fit in with the rest of the pavement, but it you replaced it with slabs you would break the slab pattern anyway, so it is kind of a no win situation anyway.

I think I plan on putting something here. Suggestions as to what are welcome. So far all I can think of is a crash barrier.
Anyway, moving on to....


Step 11;

Carry on with the pavement as per usual, adding the outside curb.


And there you have it!
Curved pavement complete.


Next step is sand (which there wont be a step by step for because I have already covered it in a previous post), and then it is onto painting (and maybe some more detailing).


That is all for one day haha :P.

C&C welcome!

-DH-
30. Random Update; that from this point out will have a name, 4: Blood Bowl! Part 2 (technically).

YES! Technically! Blood Bowl was my first post in the 'Random Update' Series! So in your FACE!

Ehem.

Sorry about that. But you know? FOOOTBBAWWWWLLLL. ROWDDDYNNESSSS. RAAAAAGGGGGGGGHHHH.
Or something along those lines.

So yeah, I've done some Blood Bowl stuff.

I got back into the idea after Blood Bowl the PC game came up on the Humble Bundle a month or so back.

Here is my prototype;


Not a fantastic job, I know.
But;
A) Prototype,
B) Table Top standard
C) FOOTBBBAWWWWLLLLLLL

Since then I've started painting the rest.
I also managed to get my hands on a Griff Oberwald and Varg Ghoulchewer, so both the Orks and the Humans have a star player to liven things up a bit.


Do any of you guys play Blood Bowl?
Let me know/tell me what you think of it/the PC game/my work

FOOTBBAWWWLLL!

-DH-

Monday, 21 October 2013

27. Follow The Grey-Concreate-Slabbed Road. Building a Gaming Board part 6.

Sooo, about that update...

And as usual it will come in fits and starts. Expect an immediate update on my Sisters of Battle.

  I managed to sort some board out. I've finished the pavement on the two straight road pieces.
I wrote up a little step by step if you want to steal/borrow/use the concept for your own stuff.


You will need;
  • PO210 00/H0 Self Adhesive Paving - found here: http://www.metcalfemodels.com/00-self-adhesive-paving - I suggest about 4 packs; two per road. They are well worth it to be honest as the can be used for basing too. I used them on my Necromunda gang
  • PVA glue - While the tiles are self adhesive, the adhesive quality is poor. Glue them down.
  • Tea Stirrers (See previous post about making the curb)
  • A LOT OF TIME!
Seriously. It takes about an four hours to do one board.

First off take a look at the slabs.


You'll be using the long slab, and the short slab. Put the squares and curves to one side.

Step two.

Using the lines you should already have on you board as a guide, put a row for long tiles out.
This should be about 5 long slabs.

Attach a curb piece (cut as before) as you go.


Step three

Unless you want a uniform running row of tiles, you need to mix it up a bit.
Using 4 long slabs, and two short slabs make another row.


Step Four
REPEAT!
Until you get halfway.


Step Five

Flip the board round and do the same on the other side.
This allows that half of the pavement to dry.


Step Six & Seven

Flip. Repeat.

DONE.


I love the way they look. Sure it takes a fair whack of time, but it is quite addictive and therapeutic.

A couple of tips;
  • Make sure to straighten each row as you go,
  • Have a cloth or sponge to soak up excess glue is necessary,
  • Save detailing (damage, weathering) until after it is dry,
  • Have a jewellers saw handy just in case you manage to go over.
This week I'll attempt to do some of the curved road piece in between bouts with the new Sisters list.
Harumph.

All feedback welcome.
Ciao

Friday, 6 September 2013

25. Random Update part 3 - Charity.

  As the title suggests I did my bit to help out charity.

I spent 99p on an item (The full price tag of the item. No haggling).

Wanna see it?


Near mint condition. Was missing 1 door mount/base, which I promptly bought for £1.54.
Total expenditure £2.53.
Current sales range for a complete set? £50 - 100 +

Yeah. I know.

If you want to know more about it, Google it, or look here - http://www.unboxedtheboardgameblog.com/2010/01/space-crusade.html

If you want to try it for yourself, either
A) Look in charity shops and see if you can find a copy/ get the missing components
B) Buy it of ebay (I might even sell this one)
C) All rules/pieces/boards can be found in printable format here -  http://johnliu.net/spacecrusade/
PS. You are welcome

PEACE
-DH-


Wednesday, 14 August 2013

21. Selling Sand to the Arabs. Building a Gaming Board part 5.

 A bit of a quick one, 'cus I keep forgetting to take pictures/do theory/ do much to the Gaming Board.

I did some tests for a suitable basing material (Sorry there are no pictures for the majority of this, just words).

I picked three types of basing sand for consideration.

The old style coarse Games Workshop sand,
The new style fine Games Workshop sand,
and 'Calcium Sand,' from a local pet shop (Used for sand based animal habitats; Lizards and such).


Test1: Basic glue and sanding.

Coarse looks good for a bit of ruble, but is way too rocky for general purpouse in a urban environment.
Fine is a bit too fine, but has great flat coverage.
Calcium is a nice medium.

After doing this test I concluded that the Calcium sand was the best general basing material, however I was was not satisfied with the coverage.
As with all basing sand it tended to rub off a bit too easily. I know another coat of glue would do the trick, but I wanted to give it something more....robust.


Test2: Pollyfiller and sanding.

Basically mixing pollyfiller up and adding sand.
This works surprisingly well.
The Calcium sand looks great as urban wasteland, where as the fine sand make for a great tarmac effect. Coarse sand didn't go down too well.

I decided that was how I was gonna do things... then add a bit of glue and sand to fill any gaps.
So here is my wasteland board tile:


All of them look pretty much similar.
Gonna spray them Humbrol Tank Grey Spray and then work from there (I managed to get a load cheap when Model Zone went into administration).
I've sprayed one so far. Two to go!

I've actually put the tarmac on the roads too... didn't get any pictures mind. I'll post them next time.


Done!

-DH-

Thursday, 8 August 2013

19. Random update, but it has models so it has a name and number. Part ?

Bit of a random update to go along with my sisters update.
Firstly because there will be little to no thematical language, just normal talk,
and secondly because of the content.

I shall explain.

  My Girlfriend has long expressed an interest in the hobby. I think it is mainly fuelled by her artistic side, though she seems keen to model and play the games too.
This is an expensive hobby to get into, and an expensive one to mess up.
So I thought I'd lend a helping hand.


We built her first Space Marine together a few months back;


 She said that if she collected space marines she'd want to do either Dark Angles, or Black Dragons (cool choices yeah?).
Unfortunately, as cool as the marine is, she wants to collect Tyranids (what is it with ladies and these chitinous monstrosities?).
So, instead of painting power armour I thought it would be better if she learnt to paint on softer edged models;


TEAM ORKZEZ.

While I will be painting;


TEAM MON-KEIGH

Yes! Blood Bowl! (yet another distraction from what I am actually meant to be doing!).

I've had the box set a long time now, and recently, me and my friends have been playing a lot of board games.
It occurred to me that, if I can get these models finished, then it will be just like another board game; once the lists are written at any rate.

Don't expect an update about these guys soon. But eventually, they will turn up again.

Touchdown!

-DH-

Thursday, 1 August 2013

15. Urban Outfitting. Building a Gaming Board. Part 4.

Insert Update. Upload Enjoyment.

 A while back I mentioned I was waiting on some bitz so I could moved forward.
Well, a week or two ago they arrived. I did all the stuff last week, so here it all is broken down into sections.


Drains.

 Real streets have drains right? So mine will too.
After having a mooch around I decided to try a couple of drain types out.
Simply put, for an imperial world, the brass etch drain from the GW urban basing kit is by far the best looking option.
Insert prototype.


med_gallery_33843_5272_161747.jpg

So theory time (boo!).

  I went out for a walk to figure this out.
On my road drains are roughly 20 curb slabs apart.
In my previous theory post I've stated a slab is approx 3ft long.
So;

3 x 20 = 60 / 2 = 30 cm

A board side is 2 ft / 61 cm = 40 slabs of curb.

So we end up with two drains a side.
Two drains, two board half's. The logical step is to stick them in the middle of each half.

This leaves the drain on the other side. When I was walking around, I saw that drains tended to alternate on each side of the road.
In which case the next logical step is to stick a single drain on the opposite side of the rod, in the middle of the board; the middle of the two drains.


Here's the result;

med_gallery_33843_5272_646264.jpg

med_gallery_33843_5272_155931.jpg

Drains done!

Next step. Lamp posts.

 Same reasoning as the drains.
If you walk down a urban road, you're are fairly likely to find yourself basking in the light provided by a lmap post.

Again, only one option jumped out at me for this;


med_gallery_33843_5272_169047.jpg

Cities of death lamp post? YES!

Theory time...

Lampposts turned out to be between 55 - 70 curb slabs apart.

3 x 50 = 150 / 2 = 75cm
3 x 75 = 225 / 2 = 112.5

Quite a large distance. Certainly there can only be one per side of the road, and due to the modular nature of the board having varying positioning of features is not possible. Modularity won out in the end so I decided to have 1 on either side of the road (again, like drains they tend to alternate), and equal distance away from the board edge, and quite far away from each other.

In the end I went for having the lampposts 10cm from the board edge; 50cm apart.
This means that each lamp post will always be 60cm apart from the next lamppost on their side of the road.


med_gallery_33843_5272_335026.jpg

 Now, I couldn't exactly attach them to board; it wasn't based or painted, and painting them would be a nightmare.
More importantly they were bound to get damaged during storage.
Enter the magnets!


med_gallery_33843_5272_334579.jpg

 I've put one in each lamppost, and one in their corresponding position on the board; 10 cm in, both sides of the road, on both board half's.
This means that I can detach them at will (painting, storage, to remove obstruction in game...) and it will help to retain the boards modular nature. The board pieces will be able to placed anywhere, and maintain the lampposts distance.


Boom.

NEXT!


Another feature of your local streets and roads is...

Manholes.

T - H - E - O - R - Y

Very simple this time. there is one every 60 slabs / 2ft (roughly).
So that is 1 per board piece.
The only way to keep the manholes 2 ft away from each other is to put it directly in the middle of the road.


As for what to use there were a few candidates;
A space marine top circular hatch thing...,
The top of a Tau Shield Drone,
An Ork Hatch.

In the end, I went with the most imperial one, The Space Marine ting... pictured here.

gallery_33843_5272_106.jpg


I'd post what it looks like, but it is boring as hell.


Anyways folk, that will do for one night.

Some updates will be thrown at you soon. Basing is up probably next on gaming board agenda.
Those big blank squares wont look like urban wasteland on their own.

I will be throwing in something else soon. Think it is about time I revisited some old friends from the Underhive

Until then any comments and/ or criticism would be welcome.

-DH-