Showing posts with label drybrush. Show all posts

Sunday, 17 May 2015

81. A Road To Glory. Bang Bang Bang Bang. Sisters of Battle Part 19.

  We're keeping this train rolling... think the train from FFVII going around the central pillar in Midgar. Like that.

Anyway, more painting has been done.

Once I'd finished those Lampposts I just picked up the next project on the project tray I had from when I was last painting.

That project was my Sisters of Battle Aegis Defence Line Quad Gun.

If you don't remember what it looked like, you can scroll back through the pages, or click the 'A Road to Glory' label to see all of my Sisters of Battle blog posts

Alternativly, you can just go here - http://theunderhiveh...ll-sisters.html

Anyway.
I just started layering the various colours; Purple, Green, Gold and Bone.

Here is where I'm at;

med_gallery_33843_5957_4939.jpg

med_gallery_33843_5957_110529.jpg

With a bit more light

med_gallery_33843_5957_58748.jpg


Cameras never really pick out highlights very well, that being said it is quite light and subtle.
It still pops a lot more than it used to.

Almost done.
I just wnat to pick out some details, maybe add a couple of highlights, and find the clear plastic bubble screen thing to go on the front.


Another update down!
Next stop = ?

Until then

-DH-

Thursday, 23 October 2014

76. A Road to Hiding Behind a Wall. Sisters of Battle Part 18.

So much for faith is our shield...

Welcome back to the Underhive!

I've been getting a couple of positive comments on my Aegis Defence Line, so I thought I'd carry on with that during this crazy painting spree I'm on.

That and I really like my Quad Gun!


If I'm honest here, I would have liked to have made more progress with this.
The reason I haven't? Scrubs.

Serious. Since my post 10 days ago I have re-watched  every season of scrubs.
Including the 'med school' spin off.


No comment.


On to painting huh?
I completed the wash and progressive drybrushing stage of the Aegis defence line


med_gallery_33843_5957_870735.jpg


While I was doing this I cracked on with the marble tiles on the base of the Quad gun


med_gallery_33843_5957_1175276.jpg


I also started the gold icons too, because; why not?


med_gallery_33843_5957_795485.jpg


The wall / tile mix is almost identical;
Denheb stone > Drybrush Karak & Screaming Skull > Add Ceramite white > progressively more white.
The only difference is that the wash on the wall is a brown one after the first stage,

The tile's wash on the other hand is a sepia wash before the last couple of layers.

The gold is just Vallejo Liquid Copper with a couple of washes of Army Painter Strong Tone.
It needs some layers and highlights to make it a bit more gold.
I like my gold beaten and dirty though, so it wont be too bright when it is done.

Here is a picture of the both together with some better lighting

med_gallery_33843_5957_80120.jpg


In between layers drying I worked on the turret a little

med_gallery_33843_5957_404464.jpg

I'm liking how this is turning out.
The Purple is obviously flat and the wrong shade, but it is only foundation purple.
Many layers before that is done.

I thought I'd throw in a little action (ish) shot for fun.

med_gallery_33843_5957_497084.jpg

'Dat test sister model cameo.
I like this action shot. It also makes em ware of how important leaving the 'girder' section metalic/ silver-ish.
It creates a nice visual 'barrier' between the Aegis and the models behind it.


That is all for now.
While I had the gold out I did some work on another piece,
but I want to do some more on that before I post updates about it (it needs a lot of work!).


Thanks for reading and/or cowering behind the nearest wall.
-DH-

Monday, 6 October 2014

74. Team D-Ork. Base = Done. Let the Layers Commence. Blood Bowl part 6.

Hello sports fans. Prepare to be generally disappointed!
Unless you are a fan of production line painting, in which case, huzzaaah!

While I wait for an opportunity to go out and get some Agrellan Earth to paint the cracked effect on my crashed Aquila (see previous post), I've been cracking on with my Ork Blood Bowl team.
So, enjoy!

First batch of picture is just base layers.

A quick silver drybrush;


Base layers of Mechrite red, Calthan/ Scorched brown and Fenris grey;


Painting the tabbards Khemri brown/Dheneb Stone;


Moving on to the first layers.
I do these before my initial shading wash to touch up anywhere I messed up on the base layers and to give the colours a bit more depth.

So the first step was the red. 50/50 Mechrite Red + Scab Red;


Then it is on to the biggie. The green.
A 1:1:1 mix of Orkhide shade, Knarloc green and Dark Angels green


Haven't finished the greens yet, so that, along with the other first layers will be the next port of call for the Blood Bowl updates.
A long way to go as after shading it lots of layers and highlights and details.
But it is starting to take shape =]


Once these guys are done I'll have to go back to the human team!
And/or all the other projects I have that are being ignored...
We'll see.


Leave some feedback, stories, tips/tricks and constructive criticisms if you so desire.
You can comment on the relevant post, or hit me up @DarkHaZZl3 on Twitter.


Until next time, thanks for reading

-DH-

Monday, 22 September 2014

72. Terrain = Grey. Brown. Repeat. 40k Urban Terrain. Crashed Aquila part 4.

Seriously.
Having themed terrain is awesome. Having a 6 x 4 Board is awesome.
Having them theme matched is extremely awesome.
Having to paint them to match is dull as fuck.


GREY?! BROWN?!
You know it.

So the day I updated this project last time round I thought I'd start doing the grey layers.

med_gallery_33843_5272_964511.jpg

Same(ish) recipe as always; Dark grey > Medium Grey > Light grey > Wash black > Final Brybrush.
(There are a couple of layers in between each stage but you get the idea)

Towards the end of last week (Friday?) |I started on the browns.
Same principle as with the grey, just with added dabbing and stippling on the ship itself to give it a weathered look;

med_gallery_33843_5272_64219.jpg

A closer picture

med_gallery_33843_5272_1077486.jpg

A close up of the metal

med_gallery_33843_5272_637261.jpg

The metal was easier than I'd anticipated.
The original layers were; Brown > Tin Bitz > Boltgun metal > Chainmail > Brown/Black wash

So to bring it back up after the basing layers got on it I gave it a heavy drybrush of Boltgun Metal.
Then I washed it with a 50/50 mix of Vallejo Smoke and Nulan Oil Wash, watered down a fair amount.
It gives it a very worn/oily brownish tint.
After that a quick drybrush of Boltgun and Chainmail and that's it.

Still some work to be done on this  ¬_¬
I've done some light weathering but I want a bit more; chipped paint, rents and tears maybe.
I want to work on the front piece a bit more; better smoke damaged glass, maybe a bit of blood splatter on the cockpit.


Also I'm toying with rust, and adding some brass details with verdigris. Thoughts?
Either comment on my wip thread on the bolter and chainsword, comment on this post or hit  up on Twitter @DarKHAZZl3


See you next time hivers
-DH-

Thursday, 8 May 2014

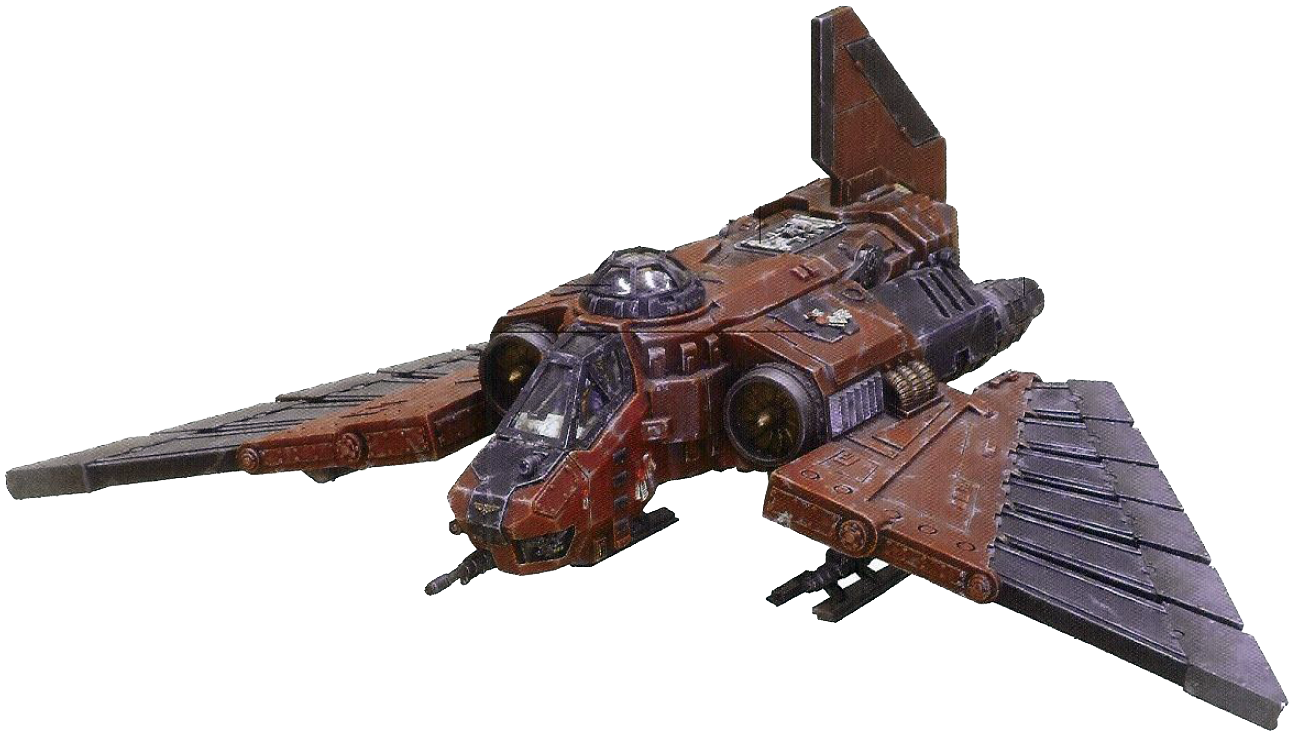
56. It Came From Urban Space. 40K Urabnd Terrain - Crashed Aquila part 1.

Ah, yet another visit to the Underhive!

 A little foreshadowing here.

Back in 2009 I started working for Games Workshop. It was awesome (most of the time).
When I first started 40K was running in 4th edition, and the starter set was The Battle for Macragge.
I didn't get a copy, because I was already building up a crazy amount of Space Marines.

The summer I joined saw the introduction of 5th edition, and the Assault on Black Reach est.

Now I don't know if you've ever been to a Games Workshops tore (you totally should), but they have an 'open copy' of the current starter set so you can see what is inside, which is really usefull for new gamers.

I digress...
The old 4th edition open copy was thrown in the stores Bitz box. This is exactly as awesome as it sounds, and will undoubtedly make an appearance in a future story.

I asked my then manager if I could nab some stuff from the set that I'd missed... namely the terrain.
So I did... and I've done nothing with it for all this time... 5 YEARS!


I've finally got round to painting it!
So here is the wip;

med_gallery_33843_5272_1066425.jpg

The model is already lightly textured, but I did add some extra rubble to tie in with my Urban ruin theme.

med_gallery_33843_5272_1108536.jpg

The metals are done in a rough fashion to help give an aged and beaten feel.

There are many ways to do this, but I thought I'd do it in homage to one of my former co-workers.

This is the Sam Mouzer method of painting metal

First off, undercoat the model black,
Then follow that with an extremely heavy drybrush of tin bitz,
Then a lighter coat boltgun metal,

And that'd usually do it....
But I added an even lighter coat of chainmail,
and finally very lightly with mithril silver.

Finish it off with a wash of a desired colour to shade it where necessary.


This was done on all the ship parts.
Those parts that have colour were painted on top this...

med_gallery_33843_5272_1404350.jpg

med_gallery_33843_5272_1462168.jpg

med_gallery_33843_5272_421949.jpg

The red is just a base of foundation red, and then progressive layers of red; from scad to blood.

For those wondering I used the Forgeworld colours as the inspiration for my colour scheme.
You'll have to either check out this link HERE or Google it as,

A) I don't own one (painted or otherwise),
B) Forgeworld have discontinued the complete model,
and
C) The best Google image is far too large for this blog and I cba to scale it down/ don't own the rights to it...


So that's another project added to my huge list of things to do....
Yay!

-DH-

Monday, 5 May 2014

55. Urban: Dense population? Where are the buildings?! 40K Urban Terrain - Imperial building part 1.

HERETICS!
SET YOUR GAZE UPON THIS CREATION OF THE EMPERORS DIVINE MAJESTY AND WEEP!

Or in other words, I've been doing some more terrain stuff; this time an Imperial Building.

On my post of the WiP of the crashed land speeder I mentioned the tiles would be painted in a similar fashion to one of my other terrain WiP's; this is the WiP

med_gallery_33843_5272_963584.jpg

med_gallery_33843_5272_855217.jpg

med_gallery_33843_5272_443916.jpg

med_gallery_33843_5272_1295401.jpg

med_gallery_33843_5272_321949.jpg

med_gallery_33843_5272_547108.jpg

Yep, it is your bog standard Imperial building from some of GW's cities of death terrain.

The tiles were my first attempt at simple marble effect paintjob.

The tiles start off brown (I undecorated the building brown for some reason...),
Painted over in Dheneb stone,
Then a light dry brush of Dheneb and Skull white,
Finally I washed with Army Painter Soft Tone.

I repeated the process a few times until I was relatively happy with the stained effect.
I finished up with a coat of gloss varnished (which you can't see in the pictures).

The tiles look okay, but too simple for a realistic marble effect.
I'm going to leave these ones as they are. but in future I'll be trying to throw different colours into the mix to give it a more layer effect.
Also, I'll be making it more bright by adding layers of very light bone.

If that doesn't go well I'll try black marble...


That is all for now.
I might post another update later on/ or in the next few days, which will again, be something unrelated...

TOO MANY PROJECTS!!

In the meantime, feel free to comment, suggest things and leave feedback!
Especially if you have experience painting marble that you'd like to pass on to me.

Peace out!

-DH-


PS. I thought I'd give a shout out to some of the guys over at The Bolter and Chainsword for constantly supporting my hobbying, and giving me feedback and suggestions along the road.

The biggest shout goes to deathspectersgt7 and Jaspcat who have followed my progress pretty much constantly for the last couple of years, which is awesome!
They also float around the B&C making it a nicer place to lurk and post. Check out there stuff (click on their names)
I'd also like to thank all the other guys who pop up now and again. I really appreciate the input. Even those who just 'like' the content I put out; it is nice to know someone is reading.


Thursday, 19 December 2013

36. Follow the Grey Slab Road. Building a Gaming Board part 9.

So... much....grey...

Dies.
Yup, I've been painting my board some.
It doesn't really look like I've done much (When in reality I've spent about 5-8 hours on it... I've lost count. I hate life).

So I thought Id share some bits and bobs with you.


First off is my tests cheme for the paveing slabs (The set on the right).

med_gallery_33843_5272_54146.jpg

Pretty simple.

- Undercoat black (Chaos black/ Any acyrlic paint),

- Paint dark grey (Any will do. I used Black acrylic and white crylic. But the GW base dark grey would be fine),

- Paint light grey (may require 2 coats; My mix was somewhere between codex and fortress grey/ Mianly white with a hint of black = Pavement grey),

- Wash with watered down black, making sure it goes into the crevices. The while still wet use some tissue paper to 'dab' off most of the paint.
This will leave the paint in the crevices and give the slab a darker tone, with a dappled effect on it.

- Drybrsuh light grey (Might have to do it twice; pavement grey),

- Very light Drybrush light-er grey (pavement grey with more white).


Done!


  Yeah, it is not a masterpeice of paintwork, but I think it looks a'ight. Especially when they'll be a shed load of them.
Adds a bit of texture prior to any detailing that might get done.


I've already done the base grey on all the pavements;


Looks a bit shitty at the moment. But it does end up like the first picture, so I'm okay with it.
Glad they're out of the way.

Things left to do;
- Finish slabs (Wash black, Dab, Drybrush x 3),
- Finish road (Very light blue-grey drybrush),
- Paint details (Drains, man-holes),
- Paint lampposts,
- Clean up edges (Black boarder).

And that should do it.

SO GODDAMN CLOSE!!
-DH-