Showing posts with label Imperial. Show all posts

Wednesday, 1 October 2014

73. The not-so-mightly Imperial Navy. 40k Urban Terrain. Crashed Aquila part 5.

After painting all the same colours for an age I decided I wanted to do something different

So I thought I'd start adding some detail to the crashed Aquila Lander.


med_gallery_33843_5272_573713.jpg

med_gallery_33843_5272_201052.jpg

med_gallery_33843_5272_531454.jpg


Hopefully the 'step by step' photo approach gives you a little insight into how I do my freehand stuff.
Not that I've really shown much of it off.

But essentially it's like drawing and then painting a picture.
I paint the outline, and then colour it in.

It isn't finished yet. This is just the template.

I'm not sure what to go for;

A cracked paint effect
or
A marble effect (stone/white)
or
A marble effect (green)

Thoughts welcome here.
Whichever is chosen it will be suitably 'roughed up' to fit with the rest of the piece.

These photos have thrown up a few bits here and there on the ed and black that need touching up, so I'll have to go back and do that as well.

Ta' for looking guys!

-DH-

Monday, 22 September 2014

72. Terrain = Grey. Brown. Repeat. 40k Urban Terrain. Crashed Aquila part 4.

Seriously.
Having themed terrain is awesome. Having a 6 x 4 Board is awesome.
Having them theme matched is extremely awesome.
Having to paint them to match is dull as fuck.


GREY?! BROWN?!
You know it.

So the day I updated this project last time round I thought I'd start doing the grey layers.

med_gallery_33843_5272_964511.jpg

Same(ish) recipe as always; Dark grey > Medium Grey > Light grey > Wash black > Final Brybrush.
(There are a couple of layers in between each stage but you get the idea)

Towards the end of last week (Friday?) |I started on the browns.
Same principle as with the grey, just with added dabbing and stippling on the ship itself to give it a weathered look;

med_gallery_33843_5272_64219.jpg

A closer picture

med_gallery_33843_5272_1077486.jpg

A close up of the metal

med_gallery_33843_5272_637261.jpg

The metal was easier than I'd anticipated.
The original layers were; Brown > Tin Bitz > Boltgun metal > Chainmail > Brown/Black wash

So to bring it back up after the basing layers got on it I gave it a heavy drybrush of Boltgun Metal.
Then I washed it with a 50/50 mix of Vallejo Smoke and Nulan Oil Wash, watered down a fair amount.
It gives it a very worn/oily brownish tint.
After that a quick drybrush of Boltgun and Chainmail and that's it.

Still some work to be done on this  ¬_¬
I've done some light weathering but I want a bit more; chipped paint, rents and tears maybe.
I want to work on the front piece a bit more; better smoke damaged glass, maybe a bit of blood splatter on the cockpit.


Also I'm toying with rust, and adding some brass details with verdigris. Thoughts?
Either comment on my wip thread on the bolter and chainsword, comment on this post or hit  up on Twitter @DarKHAZZl3


See you next time hivers
-DH-

Tuesday, 16 September 2014

70. MOAR layering. 40k Urban Terrian. Crashed Aquila part 3.

Hey guys. MOAR painting.

You can't tell from the pictures if I'm honest, but this has been several layers of black > grey and several layers of dark > lighter red. Both hit with a black and red wash respectively


Here is a closer picture that shows off the layers a bit better...


Wash leaves a little residue on large flat surfaces...so I'll be going back to 'scuff' it up a bit.

A fair bit left to do;
Base,
Metals,
Damage,
Details and embellishment.

That's all for this update. After the sheer amount of time I spent painting it so far I kinda hoped I'd have more to write.. but I really don't.
Painting large models is tedious...

Anyway
Peace out

-DH-

Wednesday, 3 September 2014

68. Black and Red. Place Your Bets. 40k Urban Terrain - Crashed Aquila part 2.

Hey guys.

As I wait for my new alcohol based painting gear I thought I'd crack on with something else


Base coating this was very, very dull.
Mainly because it is so very big and flat.
But it was something to pass the time while I was pretending to be a phone on prop hunt.
Phone = Win.

Its getting there though!
Basing + Highlighting + Extensive detailing (of which will be a lengthy process)

New update will be up before the end of this week with any luck!

-DH-


Thursday, 8 May 2014

56. It Came From Urban Space. 40K Urabnd Terrain - Crashed Aquila part 1.

Ah, yet another visit to the Underhive!

 A little foreshadowing here.

Back in 2009 I started working for Games Workshop. It was awesome (most of the time).
When I first started 40K was running in 4th edition, and the starter set was The Battle for Macragge.
I didn't get a copy, because I was already building up a crazy amount of Space Marines.

The summer I joined saw the introduction of 5th edition, and the Assault on Black Reach est.

Now I don't know if you've ever been to a Games Workshops tore (you totally should), but they have an 'open copy' of the current starter set so you can see what is inside, which is really usefull for new gamers.

I digress...
The old 4th edition open copy was thrown in the stores Bitz box. This is exactly as awesome as it sounds, and will undoubtedly make an appearance in a future story.

I asked my then manager if I could nab some stuff from the set that I'd missed... namely the terrain.
So I did... and I've done nothing with it for all this time... 5 YEARS!


I've finally got round to painting it!
So here is the wip;

med_gallery_33843_5272_1066425.jpg

The model is already lightly textured, but I did add some extra rubble to tie in with my Urban ruin theme.

med_gallery_33843_5272_1108536.jpg

The metals are done in a rough fashion to help give an aged and beaten feel.

There are many ways to do this, but I thought I'd do it in homage to one of my former co-workers.

This is the Sam Mouzer method of painting metal

First off, undercoat the model black,
Then follow that with an extremely heavy drybrush of tin bitz,
Then a lighter coat boltgun metal,

And that'd usually do it....
But I added an even lighter coat of chainmail,
and finally very lightly with mithril silver.

Finish it off with a wash of a desired colour to shade it where necessary.


This was done on all the ship parts.
Those parts that have colour were painted on top this...

med_gallery_33843_5272_1404350.jpg

med_gallery_33843_5272_1462168.jpg

med_gallery_33843_5272_421949.jpg

The red is just a base of foundation red, and then progressive layers of red; from scad to blood.

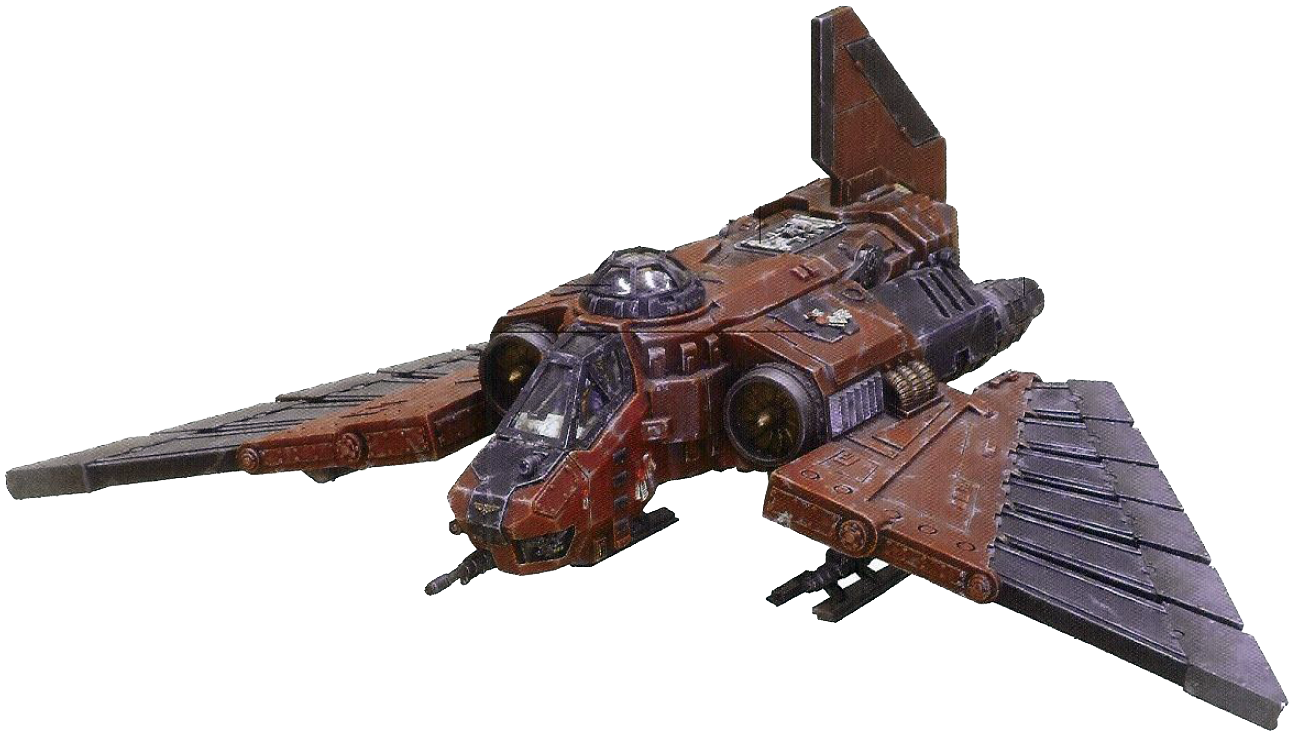
For those wondering I used the Forgeworld colours as the inspiration for my colour scheme.
You'll have to either check out this link HERE or Google it as,

A) I don't own one (painted or otherwise),
B) Forgeworld have discontinued the complete model,
and
C) The best Google image is far too large for this blog and I cba to scale it down/ don't own the rights to it...


So that's another project added to my huge list of things to do....
Yay!

-DH-

Monday, 5 May 2014

55. Urban: Dense population? Where are the buildings?! 40K Urban Terrain - Imperial building part 1.

HERETICS!
SET YOUR GAZE UPON THIS CREATION OF THE EMPERORS DIVINE MAJESTY AND WEEP!

Or in other words, I've been doing some more terrain stuff; this time an Imperial Building.

On my post of the WiP of the crashed land speeder I mentioned the tiles would be painted in a similar fashion to one of my other terrain WiP's; this is the WiP

med_gallery_33843_5272_963584.jpg

med_gallery_33843_5272_855217.jpg

med_gallery_33843_5272_443916.jpg

med_gallery_33843_5272_1295401.jpg

med_gallery_33843_5272_321949.jpg

med_gallery_33843_5272_547108.jpg

Yep, it is your bog standard Imperial building from some of GW's cities of death terrain.

The tiles were my first attempt at simple marble effect paintjob.

The tiles start off brown (I undecorated the building brown for some reason...),
Painted over in Dheneb stone,
Then a light dry brush of Dheneb and Skull white,
Finally I washed with Army Painter Soft Tone.

I repeated the process a few times until I was relatively happy with the stained effect.
I finished up with a coat of gloss varnished (which you can't see in the pictures).

The tiles look okay, but too simple for a realistic marble effect.
I'm going to leave these ones as they are. but in future I'll be trying to throw different colours into the mix to give it a more layer effect.
Also, I'll be making it more bright by adding layers of very light bone.

If that doesn't go well I'll try black marble...


That is all for now.
I might post another update later on/ or in the next few days, which will again, be something unrelated...

TOO MANY PROJECTS!!

In the meantime, feel free to comment, suggest things and leave feedback!
Especially if you have experience painting marble that you'd like to pass on to me.

Peace out!

-DH-


PS. I thought I'd give a shout out to some of the guys over at The Bolter and Chainsword for constantly supporting my hobbying, and giving me feedback and suggestions along the road.

The biggest shout goes to deathspectersgt7 and Jaspcat who have followed my progress pretty much constantly for the last couple of years, which is awesome!
They also float around the B&C making it a nicer place to lurk and post. Check out there stuff (click on their names)
I'd also like to thank all the other guys who pop up now and again. I really appreciate the input. Even those who just 'like' the content I put out; it is nice to know someone is reading.